
My Tips For Cape Brett Lighthouse Track (With Photos)
I highly recommend the Cape Brett Lighthouse Track – It’s one of the best hikes I’ve ever done.
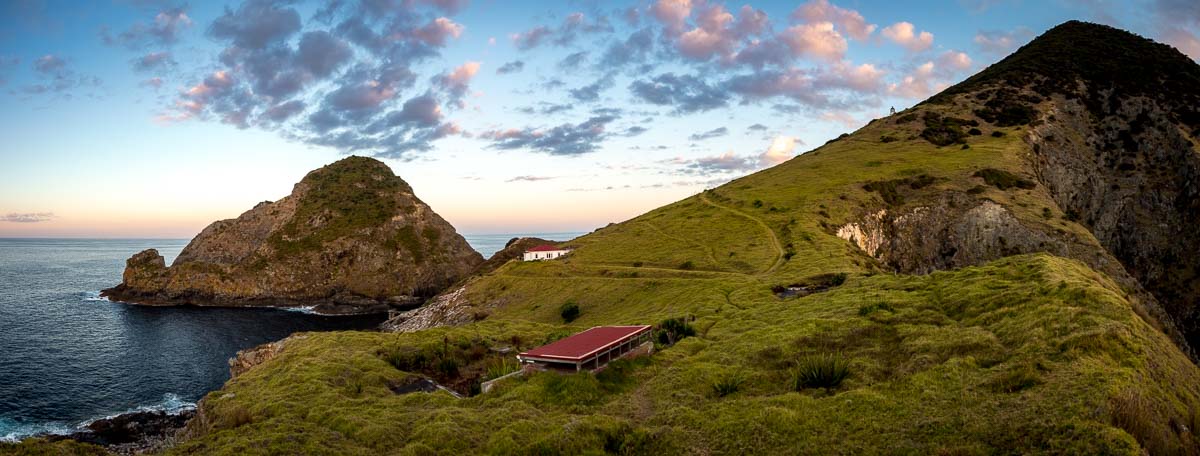
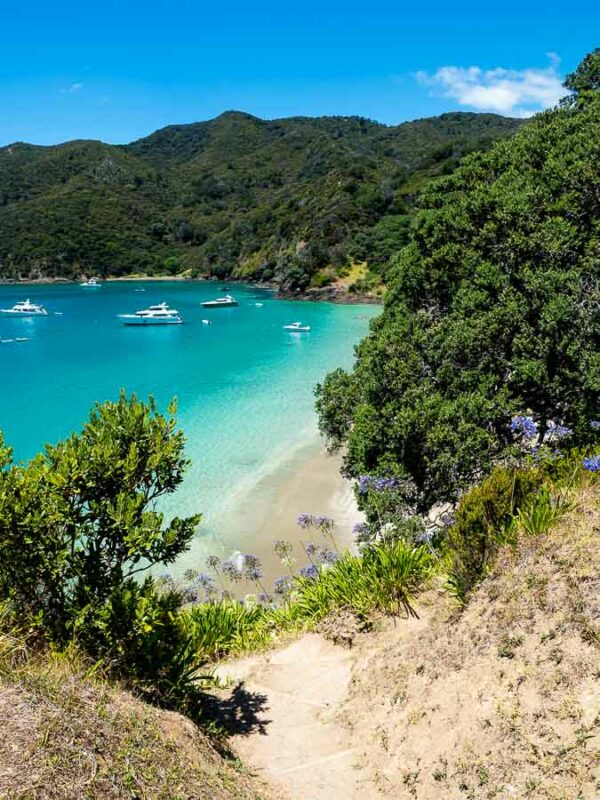
The Cape Brett hike is remote, challenging, and incredibly beautiful. But, it also only typically takes 2 days and one night (though you can day trip it). This hike offers stunning views of the Bay of Islands and a chance to explore the historic lighthouse. There are gnarly landscapes, beautiful clear water, and the most charming DOC hut to stay in (which once was the lighthouse keepers’ accommodation).
In this guide, I’ll cover everything you need to know to plan your trip, including the hike’s highlights, route options, parking, and what to pack.
Table of Contents
Why You Should Do the Cape Brett Lighthouse Walk
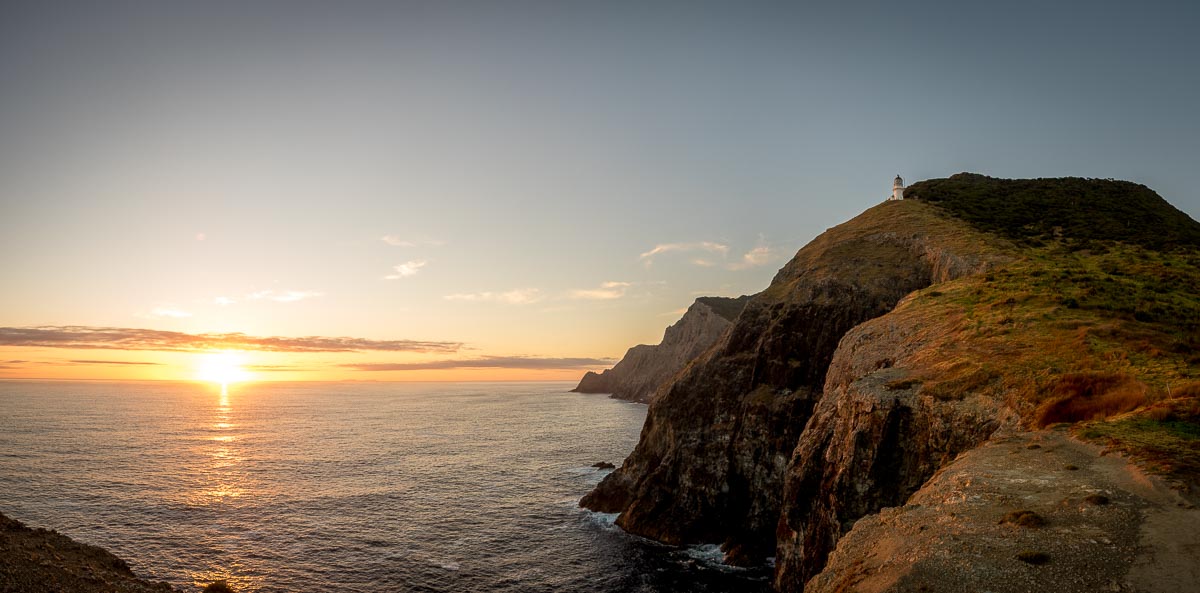
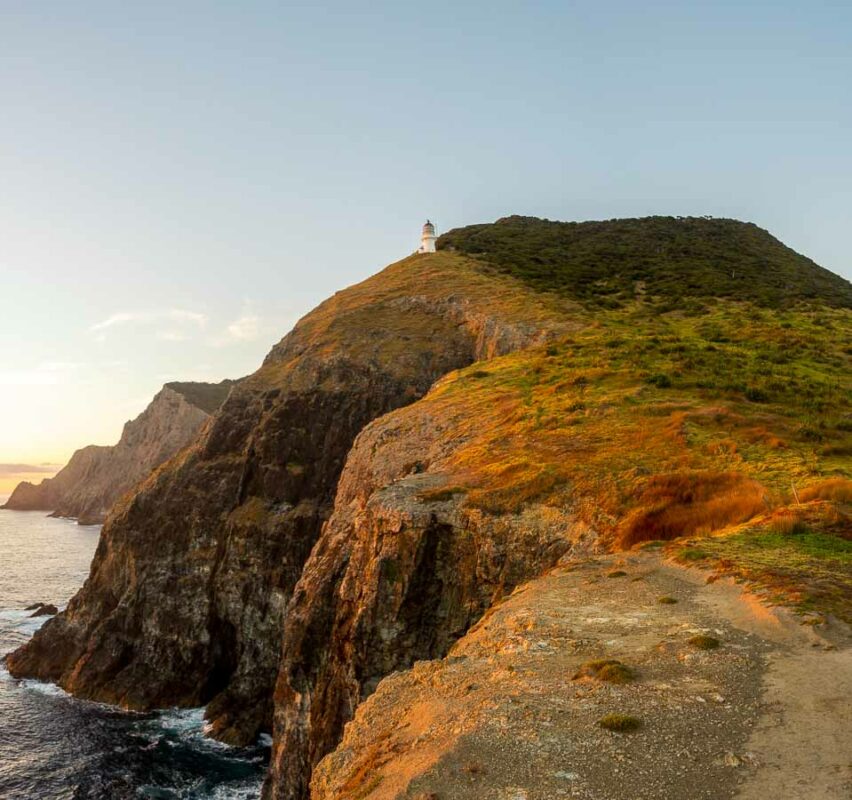
The Cape Brett Lighthouse Track is a challenging but rewarding hike that offers breathtaking views of the Bay of Islands. The trail takes you through lush forest, past rugged cliffs, and over scenic ridges. The highlight of the hike is, of course, the historic Cape Brett Lighthouse, which has been guiding ships through these treacherous waters since 1910.

A Brief Summary of the Hike
The Cape Brett Lighthouse Track is a 16-kilometer (10-mile) each-way hike that typically takes 2 days and one night to complete. The trail starts at the Oke Bay car park and winds its way through native forest to the Cape Brett Lighthouse. Along the way, you’ll encounter steep climbs, rocky terrain, and stunning views of the Bay of Islands.
| Topic | Description |
|---|---|
| Hike Length | 16.3 kilometers (10 miles) each way |
| Time Required | 2 Days / One Night. 6-8 hours each way |
| Starting Point | Oke Bay car park |
| Highlights | Breathtaking views of the Bay of Islands, historic Cape Brett Lighthouse |
| Route Options | From Te Rawhiti Marae (16 km), From Deepwater Cove (6 km), Or a mix of both |
| Parking | Limited parking at Oke Bay car park, roadside parking, or paid parking at nearby campgrounds |
| Cape Brett Hut | Basic facilities, 23 bunks.,$15 per person per night, bookings required. often no water |
| What to See | Stunning views of the Bay of Islands, native flora and fauna |
| What to Pack | Plenty of water, snacks, warm clothing, sturdy hiking shoes, hat, sunscreen, insect repellent |
| Tips | Pack plenty of water, go in late summer, cover up from the sun, bring a snorkel, take plenty of photos |
| Safety | Requires a good level of fitness and experience, mobile phone reception can be patchy, be aware of weather conditions and terrain |

Getting There
Cape Brett is certainly off the beaten track.
It’s at the end of the Russel peninsula, so you’ll need to take one of the two roads over to Russel, or the Opua ferry from Paihia.
From Auckland
If you’re coming from Auckland, the easiest way to get to the Cape Brett Lighthouse Track is to drive. The drive takes approximately 3 hours and passes through the scenic countryside of Northland.
From Whangarei
If you’re coming from Whangarei, the drive to the Cape Brett Lighthouse Track takes approximately 1.5 hours. Take State Highway 1 north to Kawakawa, then follow the signs to Opua and Okiato.
From Paihia
If you’re coming from Paihia, you can take a water taxi to the start of the track at Deep Water Cove which is the shortened version of the hike. The water taxi takes approximately 30 minutes and offers stunning views of the Bay of Islands.
If you want to do the full hike you’ll want to take the Opua car ferry and drive through to the trailhead.
Route Options
From Te Rawhiti Marae (The Full Track)
The most popular route to the Cape Brett Lighthouse is from Te Rawhiti Marae. This route is a 16-kilometer round trip hike that takes 6-8 hours to complete. The trail starts at the Oke Bay car park and winds its way through native forest and over scenic ridges to the Cape Brett Lighthouse.
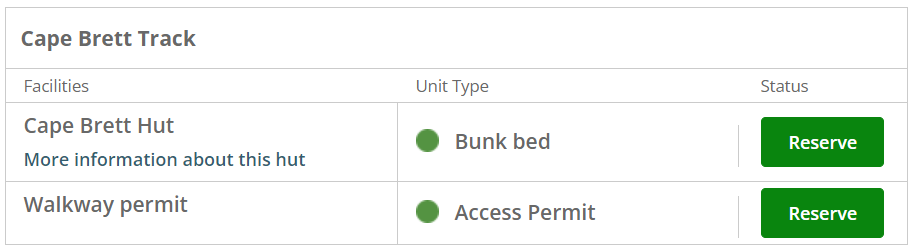
The first 10 km are through private land and you’ll need to get a permit. This costs $40 for adults, and $20 for children and can be booked from the DOC website at the same time as booking your hut reservation. (see screenshot below)
From Deepwater Cove (The Shortened Option)
Another route to the Cape Brett Lighthouse is from Deepwater Cove. This route is a 6 kilometer trip each way and takes approximately 3-4 hours to complete. The trail starts at Deepwater Cove and follows the same path as the Te Rawhiti Marae route, but skips the first section of the trail.
The first stretch of track is from deepwater cove back up to the main track (around 45minutes) then continue on the last 6km of the Cape Brett track.
This option is popular for people looking for an easier hike but to still get the experience of staying in the Cape Brett Hut. Water Taxis leave from Paihia every day. It also saves the length drive around the Russel peninsula.
A Mix of Both
If you’re feeling adventurous, you can combine both routes for a longer and more challenging hike. This route is a 22-kilometer round trip hike that takes approximately 8-10 hours to complete. Start at Te Rawhiti Marae and complete the 16km walk to Cape Brett Hut. Stay the night, and return along the 6km section of track to Deepwater Cove. From there, take the water taxi back to Te Rawhiti Marae to get your car again.
Parking at the Trailhead
On the Roadside
There is limited parking available at the Oke Bay car park, so arrive early to secure a spot. If the car park is full, you can park on the roadside near the trailhead.
Parking at Julie’s Place
If you’re coming from Paihia, you can park at Julie’s Place and take a water taxi to the start of the track at Deepwater Cove.
Parking at Hartwell’s
Another option is to park at Hartwell’s, a nearby campground that offers parking for a fee. From Hartwell’s, you can take a water taxi to the start of the track at Deepwater Cove.
The Trail From Deep Water Cove
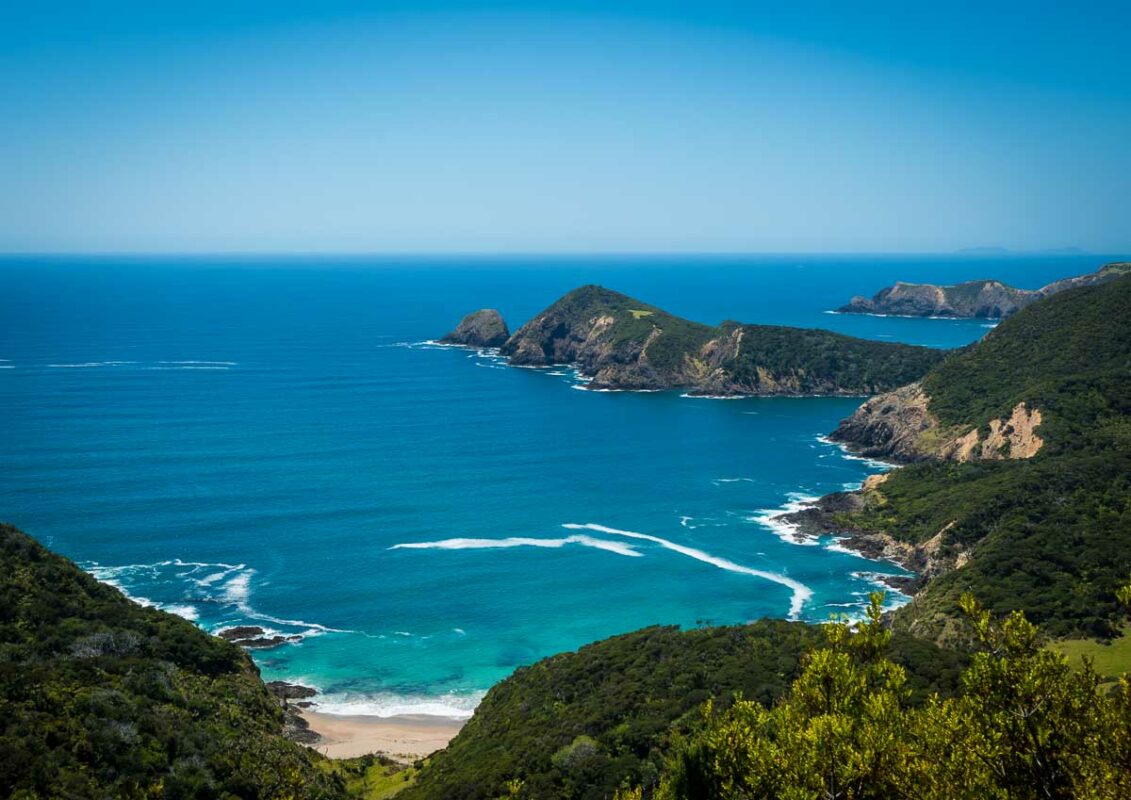
The trail from Deepwater Cove is a steep and challenging climb that takes you up and over scenic ridges. Along the way, you’ll encounter stunning views of the Bay of Islands and native flora and fauna.
If you choose to take the Te Rawhiti Marae route, you will need to obtain a permit to walk through private land. The permit fee is $40 per person (adult) and can be obtained from the Department of Conservation. The permit is valid for one year and allows you to access the track via the Te Rawhiti Marae car park.
The Trail From Deep Water Cove to Cape Brett Lighthouse
The trail from Deepwater Cove to Cape Brett Lighthouse follows the same path as the Te Rawhiti Marae route. This section of the trail takes you over rocky terrain and includes steep climbs and descents.
The climb from Deepwater Cove to the main track is steep and challenging, but only takes a few minutes to complete.

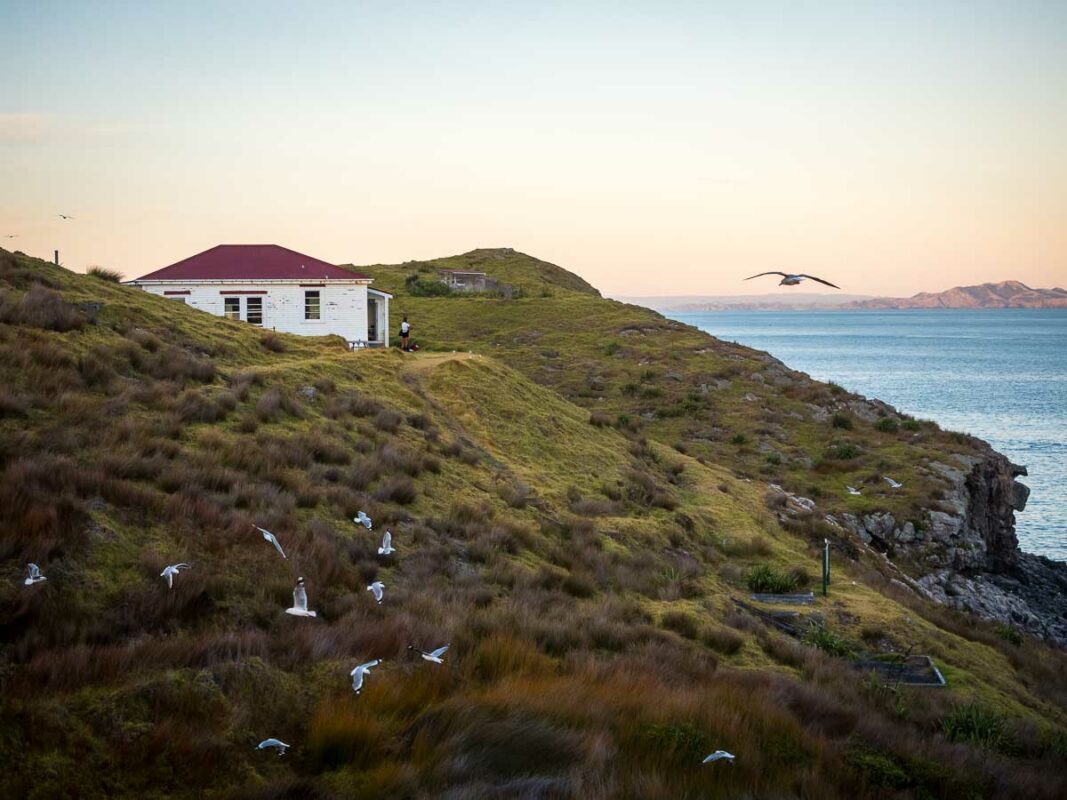
Cape Brett Hut
If you want to extend your hike and spend the night near the Cape Brett Lighthouse, you can stay at the Cape Brett Hut. The hut is located approximately 10 minutes’ walk from the lighthouse and offers basic facilities, including bunk beds, a kitchen, and a toilet.
Facilities
The Cape Brett Hut offers basic facilities, including bunk beds, a kitchen, and a toilet.
Prices and Availability
The hut is operated by the Department of Conservation and costs $15 per person per night. Bookings are essential and can be made online through the DOC website here

What to See and Do Along the Way
Along the way, you’ll encounter stunning views of the Bay of Islands, native flora and fauna, and the historic Cape Brett Lighthouse. Take your time and enjoy the scenery, and don’t forget to bring your camera!
What To Pack (My Specific Recommendations)
Packing the right gear and equipment is essential for a successful overnight at the Cape Brett hut. Here are some items that you should consider bringing. A lot of this is pretty general, but I’ve added a few personal recommendations and lessons learned as well:
- Backpack:
A sturdy backpack that fits well and can carry all your gear. I took an Osprey Atmos
65L pack and that was perfect. - Hiking boots:
Proper hiking boots with good ankle support and traction on steep and slippery terrain. Honestly, these days I lean much more to trail shoes than boots. They are much more comfortable and lightweight. I did this hike in a pair of Altra Lone Peaks. - Clothing:
Dress in layers and bring warm and waterproof clothing, including a rain jacket, thermal base layers, fleece or down jacket, hat, gloves, and warm socks. A Merino base layer is a must even in the heat of summer.
I wore a Icebreaker BodyFit base layer which was the perfect option to to sheild me from the sun. Even though its a ‘thermal’ merino keeps you cool and dry whereas cotton would be drenched in sweat. - Rain Jacket.
The weather on Cape Brett Peninsula is very changeable. I packed my Macpac Copland Raincoat but luckily didn’t need it. - Food and water:
Bring plenty of high-energy snacks, such as nuts, dried fruit, and energy bars, as well as a refillable water bottle or hydration system. I took a back country meal for dinner and some museli and protein power for breakfast. - Sleeping bag:
A warm and lightweight sleeping bag rated for below-freezing temperatures.
Hot tip – grab a cheap single fitted sheet from Kmart to prevent sticking to the vinyl hut mattress. Warmer too! - Cooking equipment: If you plan to cook your own meals, bring a stove, fuel, cooking pot, utensils, and food. Get cheap gear from Aliexpress (can’t fly with gas)
- First aid kit: A basic first aid kit with essentials such as bandages, antiseptic, pain relievers, and blister treatment.
- Map and compass: A detailed map and compass or GPS device to navigate the trail. Download maps or rent a PLB from Macpac?
- A good lightweight camera
When I climbed Adams Peak i took my super lightweight Olympus OMD EM5 MkII with M. Zukio 12mm – 40mm PRO lens. Great camera, but getting a bit old now. If I did it again I’d recommend something like the Fujifilm XT4 or similar. OR, check out my full guide to hiking cameras here. - Flashlight or headlamp,
Go Black Diamond. Go USB rechargeable. They’ve served me so well and this one is a goodie
Keep in mind that you will need to carry all your gear and food with you during the hike, so pack light and only bring what you need. It’s also a good idea to check the Department of Conservation website for a full list of recommended gear and equipment.
My 5 Tips for Your Cape Brett Walk
- Pack Plenty of Water: The hike is long and challenging, so make sure to bring plenty of water to stay hydrated. Like I mentioned before, there was no water at the hut when i went so we were glad to have brought enough for 2 days.
- Go in Late Summer: The best time to hike the Cape Brett Lighthouse Track is in late summer, when the weather is warm and dry.
- Cover Up from the Sun: The New Zealand sun can be strong, so make sure to wear a hat and sunscreen.
- Bring a Snorkel (or Goggles): If you’re staying at the Cape Brett Hut, bring a snorkel or goggles to explore the nearby marine reserve.
There’s access down the cliff via an old tramway to a concrete pier at the bottom. From there it’s a great spot to snorkel around the rocks (but be careful in rough weather).
Also, it’s well worth the detour to Deep Water cover for a quick swim and snorkel there too! - Take Loads of Photos: The views along the Cape Brett Lighthouse Track are breathtaking, so make sure to bring your camera and take plenty of photos!
Final Thoughts
The Cape Brett Lighthouse Track is a challenging but rewarding hike that offers stunning views of the Bay of Islands and a chance to explore the historic lighthouse. Whether you’re a seasoned hiker or just getting into multi-day hikes, this is a must-do for anyone visiting Northland.
FAQ:
Q: Is the Cape Brett Lighthouse Track suitable for beginners?
A: The Cape Brett Lighthouse Track is a challenging hike that requires a good level of fitness and experience. Beginners should take caution and be prepared for a long and strenuous hike.
Q: Is there mobile phone reception on the track?
A: Mobile phone reception can be patchy along the track, so it’s best to bring a satellite phone or radio if you need to stay in touch.
Q: Are there any safety concerns on the track?
A: The Cape Brett Lighthouse Track is a rugged and remote hike that requires caution and preparation. Be aware of the weather conditions and the terrain, and make sure to bring plenty of water and supplies.