My Kilimanjaro Lemosho Route Itinerary (8 Days, Day by Day)
I climbed Kilimanjaro via the 8-day Lemosho route in 2019. This is what that actually looked like, day by day – from the bribe at the police checkpoint to the eerie midnight summit push to the stretcher evacuations on the way down.
The Lemosho approaches from the west, crosses the Shira Plateau, and joins the southern routes for the summit via Barafu Camp. At 8 days it’s one of the longer options – better acclimatisation, higher success rate. I go into the reasoning in my Kilimanjaro route comparison.
Table of Contents
Is 8 Days Enough?
Yes. Eight days on the Lemosho is the sweet spot for most people. You get proper acclimatisation without the extra cost of a 9-day trip. The key day is Day 4 (Shira II to Lava Tower to Barranco) – you climb to 4,600m then sleep at 3,900m. That “climb high, sleep low” profile is what makes 8 days work.
I never had serious altitude symptoms beyond a mild headache on days 5-6. Friends who did 6-day routes on Machame had a much rougher time. If budget allows, 8 days is the move.
Lemosho 8-Day Itinerary at a Glance
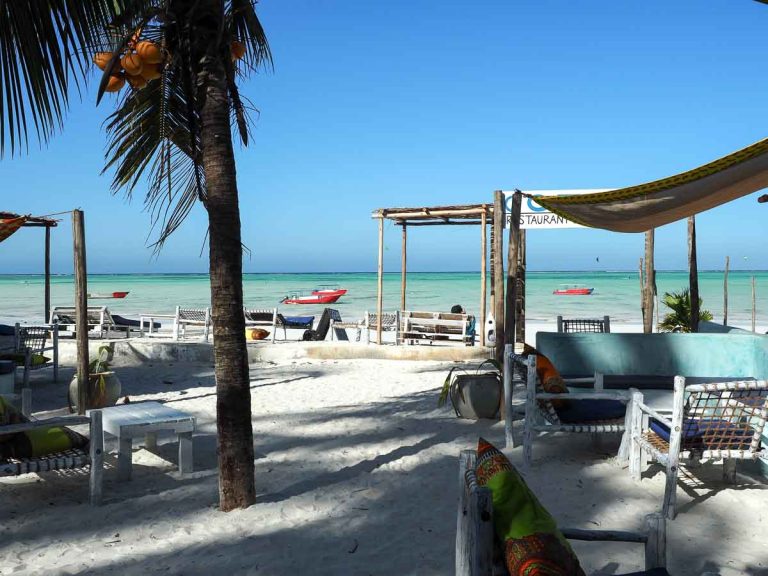
Day 1: Londorosi Gate to Mti Mkubwa Camp
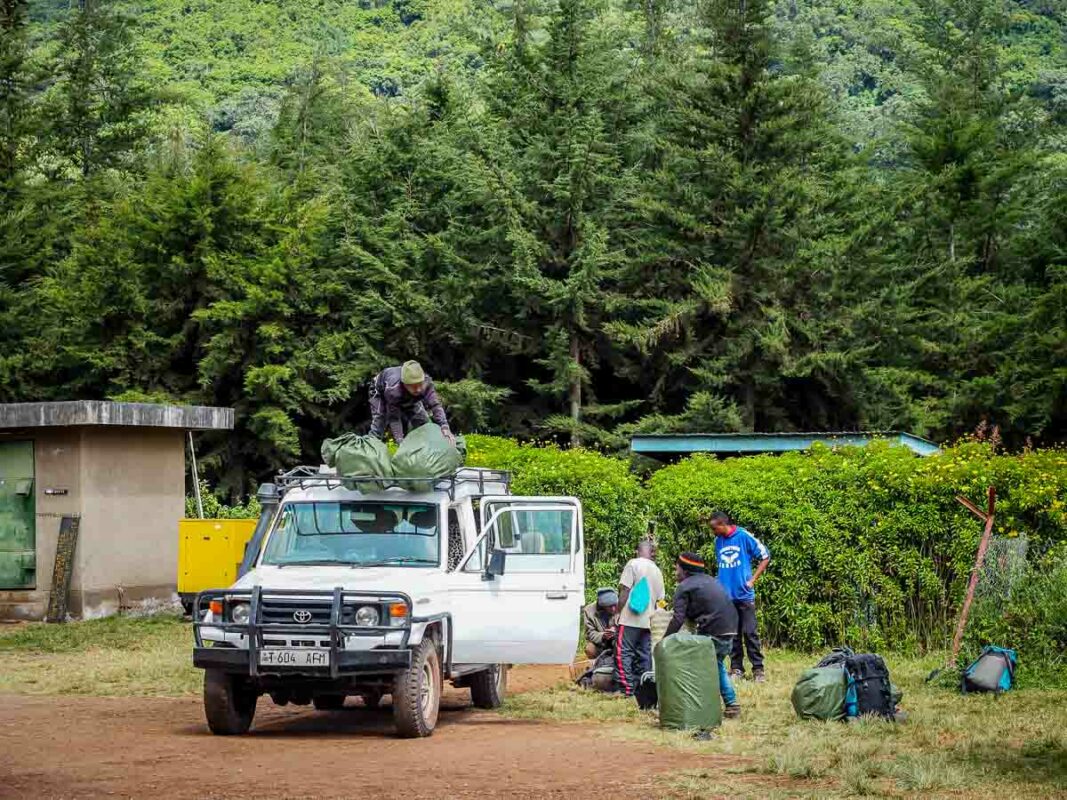
The day starts with a 3-4 hour drive from Moshi to Londorosi Gate. Ours involved our guide handing a police officer $50 to get us through a “vehicle inspection” at a checkpoint along the way.
*Welcome to Tanzania.*
At Londorosi you register, sign the park book, and watch your porters sort and weigh bags. Surprising amount of paperwork. Then it’s another short drive to Lemosho Glades, where the actual trail begins.
The hike itself is gentle – about 3 hours through proper rainforest. Mossy trees, bird calls, the occasional blue monkey overhead. Mti Mkubwa (“Big Tree”) camp sits in a clearing at 2,820m. We arrived mid-afternoon, ate an enormous dinner cooked by a crew that had somehow beaten us there on foot, and crashed.
Day 2: Mti Mkubwa Camp to Shira Camp 1

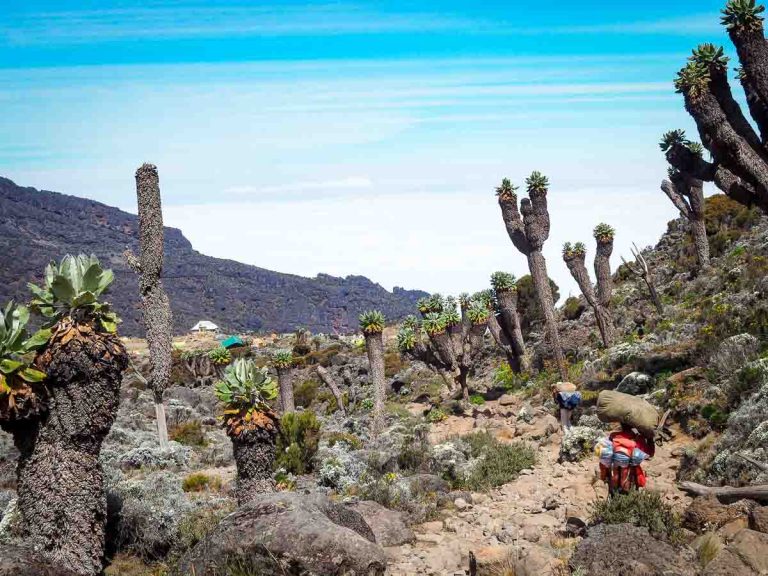
Longest day in terms of hours. The trail climbs steadily out of the rainforest into moorland – giant heathers, lobelias, and those weird alien-looking groundsel plants that have no business being real. The vegetation changes so fast it feels like time-lapse.
By mid-morning you break above the tree line and there it is. Kilimanjaro’s summit, impossibly high and white above you. First time you really grasp how far you have to go.
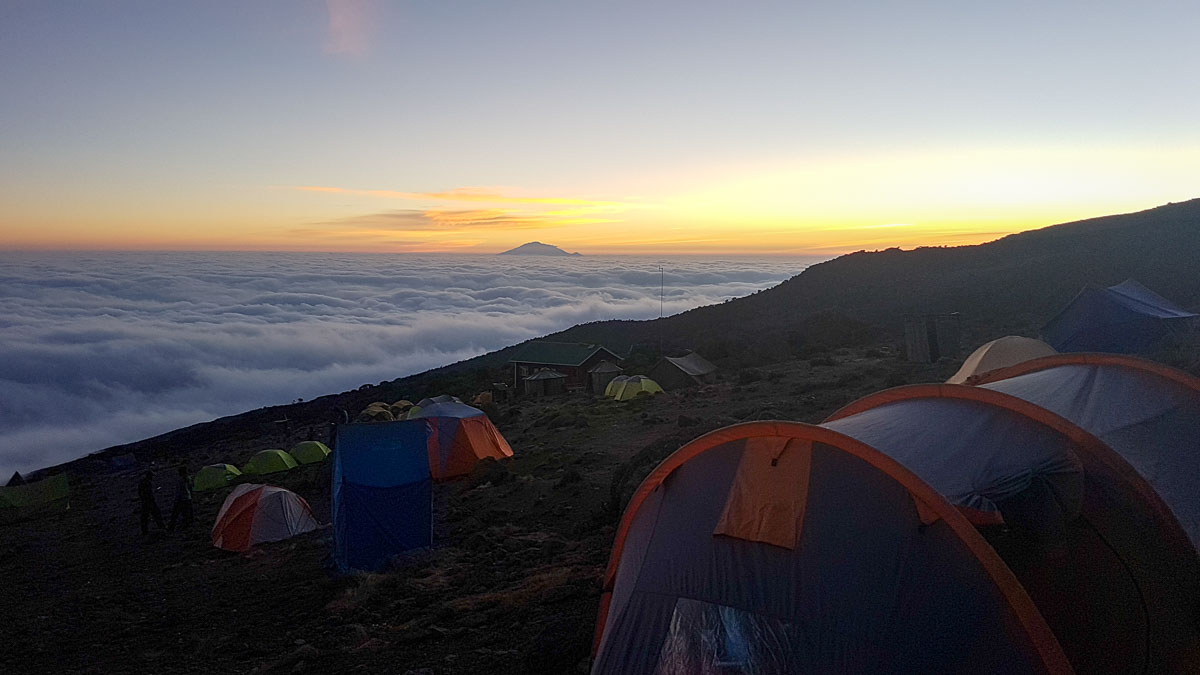
Shira Camp 1 sits at 3,500m on the edge of the plateau. Temperature drops hard once the sun goes down. This is where the “water for washing” ritual begins – guide calls it out every evening and produces a small bowl of warm water. You learn to appreciate it.
Day 3: Shira 1 to Shira 2 Camp

Easiest day on the mountain. A leisurely 4-hour walk across the Shira Plateau – flat, open, and almost surreal. Feels more like the Scottish Highlands than equatorial Africa.
This is your body’s acclimatisation day. Take it slow, drink water constantly. Kibo peak looms directly ahead, Mawenzi off to the right. You’re above the cloud layer by now, which does something funny to your sense of scale.
The sunsets from up here are absurd.


Day 4: Shira 2 to Lava Tower to Barranco Camp
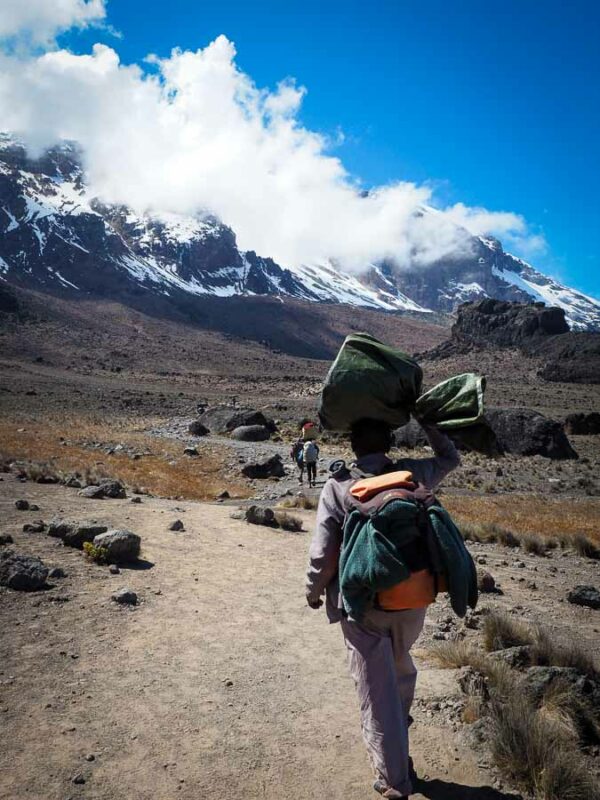
Hardest day. You climb from 3,850m up to Lava Tower at 4,600m – the highest you’ll go before summit night – then descend back to Barranco Camp at 3,900m. “Climb high, sleep low.” This is the day that makes 8-day routes work.
The landscape shifts to alpine desert. Almost nothing grows. The air is thin and cold, terrain is all loose rock and scree, and your brain starts doing this thing where it just… doesn’t want to think about anything complex. I felt the altitude for the first time at Lava Tower – dull headache, slight nausea. Both eased within an hour of descending.
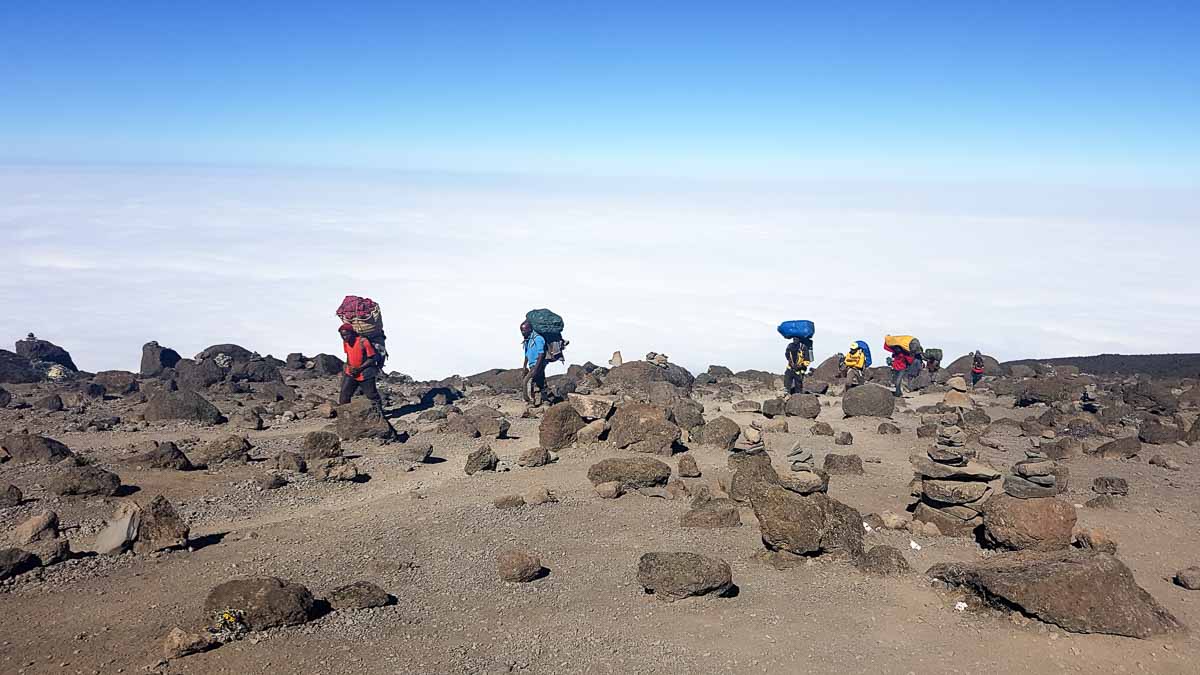
At one point I offered to carry a porter’s load – the 20kg bag they balance on their heads all day. Got it on my shoulders and made it maybe 200 meters before my neck was screaming. They do this for 8 days straight. My neck was sore for a month.

The descent to Barranco passes through the Senecio Forest – giant groundsel trees that look like props from a dinosaur film. Barranco Camp itself is spectacular. Tucked below the massive Barranco Wall that you’ll scramble up first thing tomorrow.
Sleep well.
Day 5: Barranco Camp to Karanga Camp
Starts with the Barranco Wall. Looks terrifying from below – steep rock face, people scrambling up it like ants. But it’s really just a hands-on scramble with good holds. No ropes. Took about an hour and I genuinely enjoyed it. Most “mountaineering” feeling of the whole climb.
After the wall, the trail undulates through valleys to Karanga Camp. Short day – about 4 hours – which is deliberate. You’re resting up for the summit push.
This is also where the Machame route hikers merge onto your trail. Camp gets busy. More tents, more noise, more competition for the toilets. The Lemosho exclusivity is officially over.
Speaking of toilets. They’re a long-drop with a squat hole in the floor. I almost dropped my phone down one. It survived, but came back covered in… juices. Some things you can’t unsee.
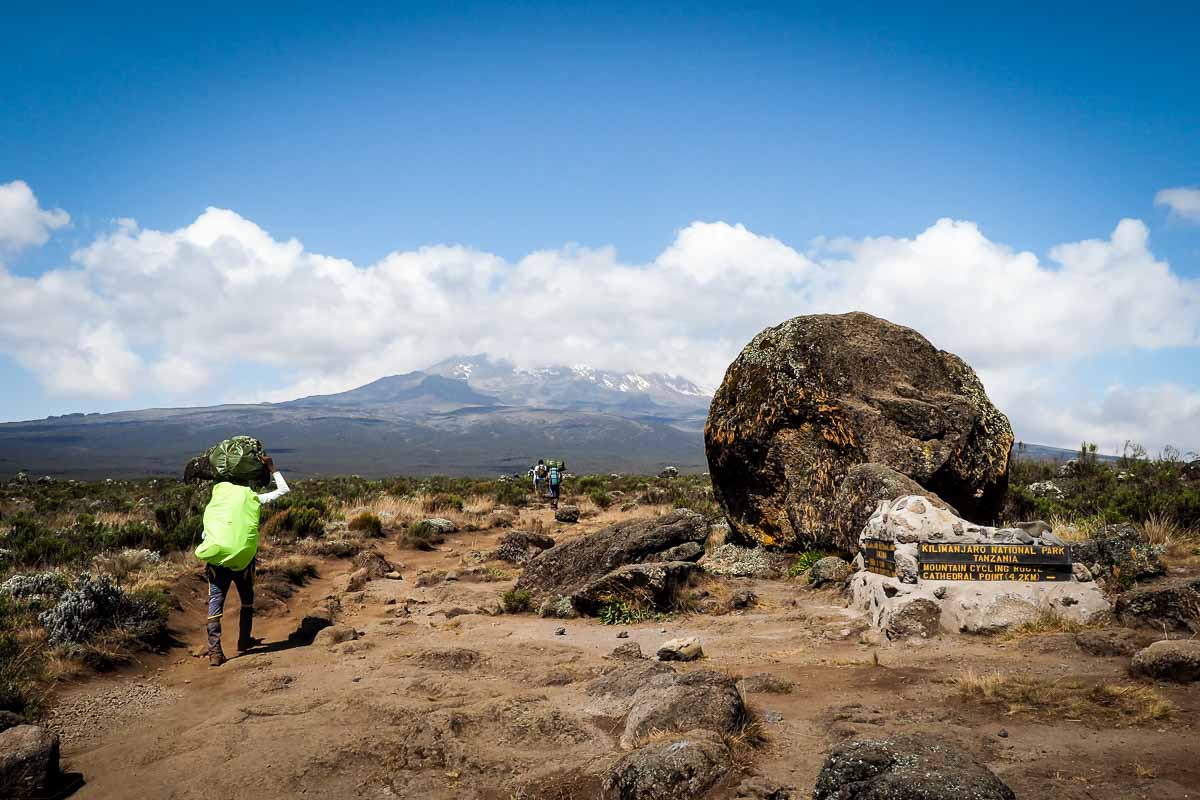
Day 6: Karanga Camp to Barafu Camp (Base Camp)
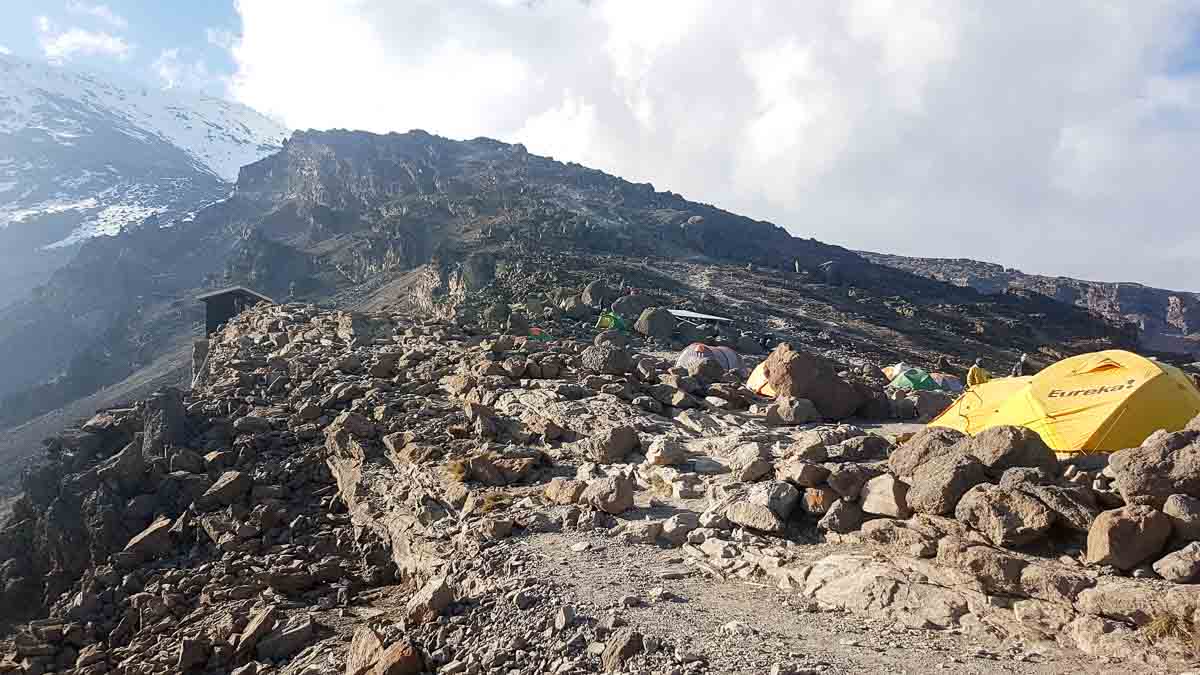
Short but steep. Three hours of relentless uphill on exposed, wind-blasted terrain. Barafu Camp at 4,673m. Base camp.
Barafu is grim. Cold, windy, barren. Everyone looks slightly haunted. You arrive around noon, eat lunch, try to sleep. I managed maybe 90 minutes before the midnight wake-up call.
Every so often, guides would whizz past camp with a metal stretcher – a mountain bike tyre welded to the middle – evacuating a tourist at terminal velocity down the mountain. Not exactly reassuring the afternoon before your summit attempt.
Heads up: If you haven’t been drinking enough water or eating enough food, you’ll feel it here. Force yourself – tomorrow is the hardest day of your life.
Day 7: Barafu Camp to Uhuru Peak to High Camp

Midnight. -15°C. Headlamp on, four layers, thermos of ginger tea that went cold within the hour.
Summit night is eerie. Perfectly quiet except for boots on scree and your own breathing. You look up and there’s just a trail of headlamps snaking up the mountain ahead – other groups who left earlier. Look down and there are more behind you. Nobody talks. Everyone is focused on putting one foot in front of the other.
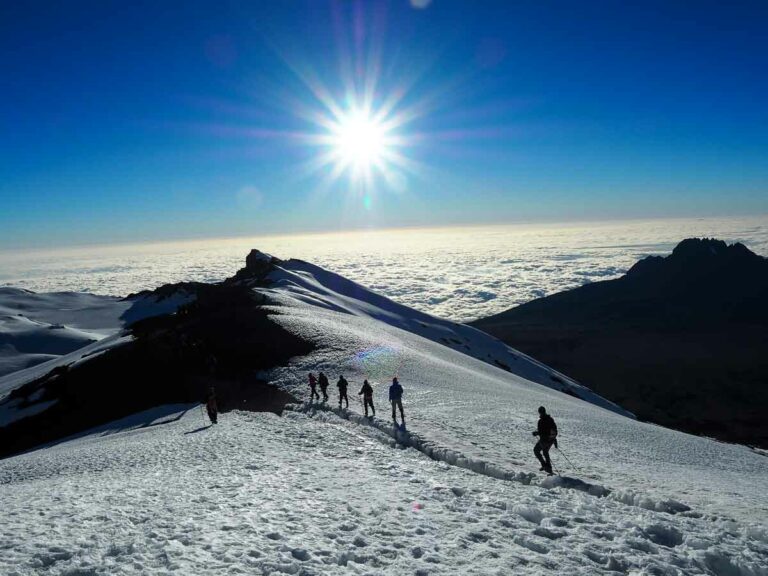
Steep switchbacks on loose gravel for about 5-6 hours to Stella Point on the crater rim. This is where most people turn back. From Stella it’s another hour along the rim to Uhuru.


I made it.
Sunrise over the glaciers. Clouds below in every direction. You get maybe 15-20 minutes at the top – long enough for photos and a moment to just… stand there – before the guides start pushing you back down.

Descent back to Barafu takes 2-3 hours. Scree-surfing, essentially. Quick lunch, pack up, continue down to High Camp at ~3,100m. Total day: 12-14 hours of hiking. Your legs will know about it.
Tip: Keep your camera and phone inside your jacket on summit night. Batteries die instantly in the cold. I almost missed my summit photos because of this – I wrote about it in my Kilimanjaro lessons article.
Day 8: High Camp to Mweka Gate
The final descent. Honestly? One of the best feelings of the whole trip.
The journey down was like a pressure being released slowly from my brain. The headache that had been building for days started to fade. Eyes felt less bloodshot. Breathing got easier with every hundred meters. By the time we hit rainforest again I felt almost normal.
Trail from High Camp to Mweka Gate is about 5-6 hours. Moorland, then rainforest. Muddy and slippery in places – hard on the knees after yesterday.
At Mweka Gate you sign out, collect your certificate, and do the tipping ceremony with your crew. Then a bus back to Moshi. A long shower. The coldest, most satisfying beer of your life.
Before You Book the Lemosho Route
Operator: The Lemosho is offered by most Kilimanjaro operators. I’d recommend booking one of the reputable operators I shortlisted – the main differentiators are group size, gear quality, and how well they treat their porters.
After carrying that porter’s bag for 200 meters on Day 4, I have a lot of opinions about operators who underpay their crew. Choose one that pays fair wages and provides proper gear for their team.
Cost: Expect $2,000-4,000+ per person all-in. I break down exactly where that money goes in my Kilimanjaro cost guide. Most of it is park fees.
Fitness: You don’t need to be an athlete, but you do need to be comfortable hiking 5-7 hours a day with a daypack. I trained by doing long weekend hikes with elevation gain for about 3 months beforehand. More detail in my how hard is Kilimanjaro article.
Diamox: I took it and had no side effects. Some people hate it. Here’s my full take on Diamox.
Packing: Layer system is key. My full Kilimanjaro packing list covers what I actually used vs. what was dead weight.
Tanzania Travel Planning Cheatsheet 🇹🇿
🚑 Should I buy travel insurance for Tanzania?
100% YES! — Tanzania has now introduceed “free” healthcare but it’s only for citiens! Tourists need travel insurance in case anything happens on your visit. Also be aware many policies won’t cover high altitude hiking as it’s a high risk activity!
(That’s right, check the t&c’s on your complimentary credit card insurance)
I highly recommend World Nomads as you can get specific add-ons for high altitude hiking UP TO 6000m (Which most travel insurance companies don’t offer!)
🎫 Do I need a visa for Tanzania?
Probably not — Tanzania now provide a visa on arrival (VoA) for most western countires which allows you stay for up to 90 days. However, some other countries do need a pre-approved eVisa (check here!). VoAs cost $50 USD for a single entry – Note, US Citizens are required to get a Multi-Entry visa which costs $100 USD. (View visa prices here)
If transiting through Kenya (a lot of people fly via Nairobi), you’ll need a Kenyan visa too. Visa’s cost $20 for a 3 day transit visa and $50 for a toursit visa
(By the way, on both my interactions with the imigration officers in kenya they tried to scam me, so know what your obliged to pay and BRING THE EXACT CASH for the visa!)
💉Do I need any vaccinations for Tanzania?
YES! Make sure you are up-to-date with all your vaccines. Common travel vaccines include Hep A/B + Typhoid, and Diphtheria + Tetanus.
A yellow fever vaccination isn’t a requirment to visit Kilimanjaro but is for neighbouring areas in East Africa. In reality, you will might not be allowed back into your home country on your return (I was asked for proof of vaccination upon returning to Australia) so getting this jab prior made for good peace of mind.
Rabies is an issue in Tanzania but the vaccine is expensive and ineffective as a preventative measure (it only lasts a few years and you’ll need to get them again if you require treatment). If bitten by a stray dog seek immediate medical attention!
As always, talk to your GP or specialised travel doctor a few weeks BEFORE you leave.
🏩 What’s the best Kilimanjaro Tour operators?
Your only realy two options here are Kumano Travel and Booking.com. Its a complicated process so I wrote this guide here on the best kumano kodo accomodation options
If you don’t want to figure it all out (it’s meant to be a holiday after all) you can book a package tour. Here are my recommendations for both guided and self-guided.
💸How do you pay for things in Tanzania?
Cash is king in Tanzania, so you’ll want to get some folding tender out from an ATM when you land. Larger businesses and hotels will take Debit / Credit Card but most resturants, and street vendors want cash. I even had to pay for my Kili trip in cash!
I personally use a Wise debit card for all my international money needs as they only convert the funds when you make payment, plus they offer a much better spread (margin on the true exhange rate) than the banks do. They work in all the Tanzanian ATMs I tried.
🚌 What’s the public transport like in Tanzania?
There is a good basic network of local and inter-city busses in Tanzania and travel this way is very cheap. Domestic flight are also very affordable and a far more comfortable option. Checkout Busbora for booking bus tickets online.
📲 How do I get internet/data/wifi in Tanzania and on the mountain?
This one needs a whole nother article, but the short version is prepaid SIM cards are cheap and availible to tourists and locals alike (You don’t need a pricey tourst SIM!)
Your cheapest option is buying a physical sim card on the street corner once landed and getting the shop assistant to help you set it up. I went with Vodacom and had generally good coverage, even up on Kili!
Another option is the Saily eSIM. This is a little more expensive but works from the moment you land is is SOOOOO much easier. It also gives you connectivity across 14 neighbouring African Countries and connectivity the moment you step off the plane!
TIP: I used to use Airalo but now find Saily a much better product – you can get 5% off with code SPECIAL5
✈️ What’s the best site to buy flights to Tanzania?
For finding cheap flights, I recommend Skyscanner. Once you find the flight you’re looking for, I’d then suggest booking directly with the carrier (even if it costs a few $$ more than with one of the agreggators/agencies).
💧Can you drink the water in Tanzania?
Safest not to — tap water in Tanzania may be OK (the locals drink it) but is generally untreated and not reccommended for tourists. Purchase bottled water for drinking and teeth brushing.
🏔️💧Can you drink the water on Mount Kilimanjaro?
Yes — Your tour company with ensure the water provided to you is safe to drink by either carrying in bottled water, or by treating stream water with purification tablets or by boiling it. If you want to drink water from the rivers and streams you generally can but should do so at your own risk. ALWAYS follow best practice and drink from fast flowing water as far up stream as possible. I’d also recommend a Brita Water Bottle for rehydrating on the trail safely.


beautiful blog post with very helpful narrative tips with nicer photos.
Thank you for sharing
Thanks Tatiana for the kind words!