Hiking Mount Ruapehu | Guide To Climbing An Active Volcano
Mount Ruapehu is the tallest mountain on New Zealand’s North Island. As one of the country’s most active volcanoes, it’s an awe-inspiring place to hike. You’ll experience vast landscapes, crater views, and the occasional reminder that you’re standing on a living, breathing mountain.
I hiked to Dome Summit (there are multiple peaks) from Whakapapa Village in the summer, and it was one of the most satisfying day hikes I’ve done. If you’re considering it, here’s what you need to know before setting off.
Quick Overview
- Distance: ~10km return
- Time: 5-7 hours return
- Difficulty: Hard
- Elevation gain: 633 m
- Best time to hike: January — March (summer)
- Start point: Whakapapa Ski Area
- Highest point: 2,797 m
- Dog friendly: No
Table of Contents
A Brief History of Ruapehu
Mount Ruapehu is located in the central North Island of New Zealand. It stands at 2,797 meters (9,177 feet) tall and is the highest point on the North Island. The mountain is tapu to Ngāti Tūwharetoa, the local iwi, who have lived in the area for over 1,000 years. The last major eruption of Mount Ruapehu occurred in 1995, and the mountain has been closely monitored ever since.
The surrounding 80,000-hectare Tongariro National Park is one of three World Heritage sites in New Zealand, and one of only 29 sites in the world listed with Dual Heritage status.
Read up on the Pūrākau (legends) of Ruapehu here – including the infidelity between Ruapehu and her husband Tarankai.
Starting at Whakapapa Village
Whakapapa Village is the gateway to Mount Ruapehu. It’s nestled at the base of the volcano in Tongariro National Park, a quiet, alpine-style settlement with everything you need to prepare for the climb, such as accommodation and a few eateries.
Even if you’re just here for the day, it’s worth taking a moment to wander through. The Tongariro National Park Visitor Centre is a great stop before heading out. You’ll get weather reports, trail conditions, and tons of other valuable information.
Route Options
There are several different routes you can take when climbing Mount Ruapehu. I went to Dome peak when I summited as it’s the most popular and most direct from the Whakapapa ski field side.
The Different Peaks
- Dome Peak: This is the most popular peak to climb on Mount Ruapehu. It stands at 2,746 meters (9,006 feet) tall and offers stunning views of the surrounding landscape.
- Tahurangi Peak: This is the highest point on Mount Ruapehu, standing at 2,797 meters (9,177 feet) tall. It’s a challenging climb, but the views from the top are worth it.
- Te Ataaua Peak: This peak stands at 2,681 meters (8,796 feet) tall and offers panoramic views of the surrounding landscape.
- Tukino Peak: This peak is located on the eastern side of Mount Ruapehu and stands at 2,755 meters (9,039 feet) tall. It’s a challenging climb, but the views from the top are breathtaking.
To get to Dome Peak you have two choices here:
- Hiking from the base: This is the longest trail and gradually climbs through volcanic terrain.
- Sky Waka gondola to Knoll Ridge: A faster route that cuts down the total hike time.
If you want the full experience, I strongly recommend starting at the base. It may not be the most visually stunning section (you’ll be climbing through an empty skifield), but it’s worth it – and pretty interesting seeing all the ski infrastructure without it’s snow.
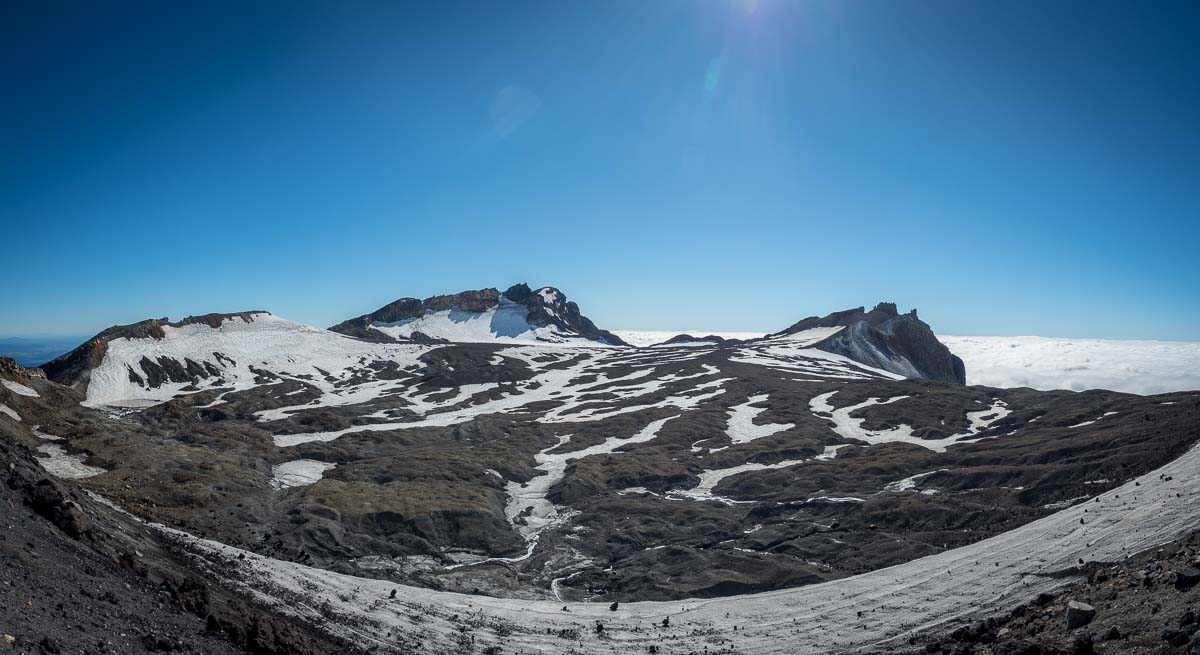
Hiking Up Through the Volcanic Terrain

Once past the gondola station, the real climb begins. The trek is mostly over loose rock and scree, making it a bit of a grind. Expect to scramble in some sections, and wear good hiking boots because the uneven volcanic terrain is no joke. There’s no marked trail beyond this point, just poles guiding the way, but it’s fairly easy to follow.
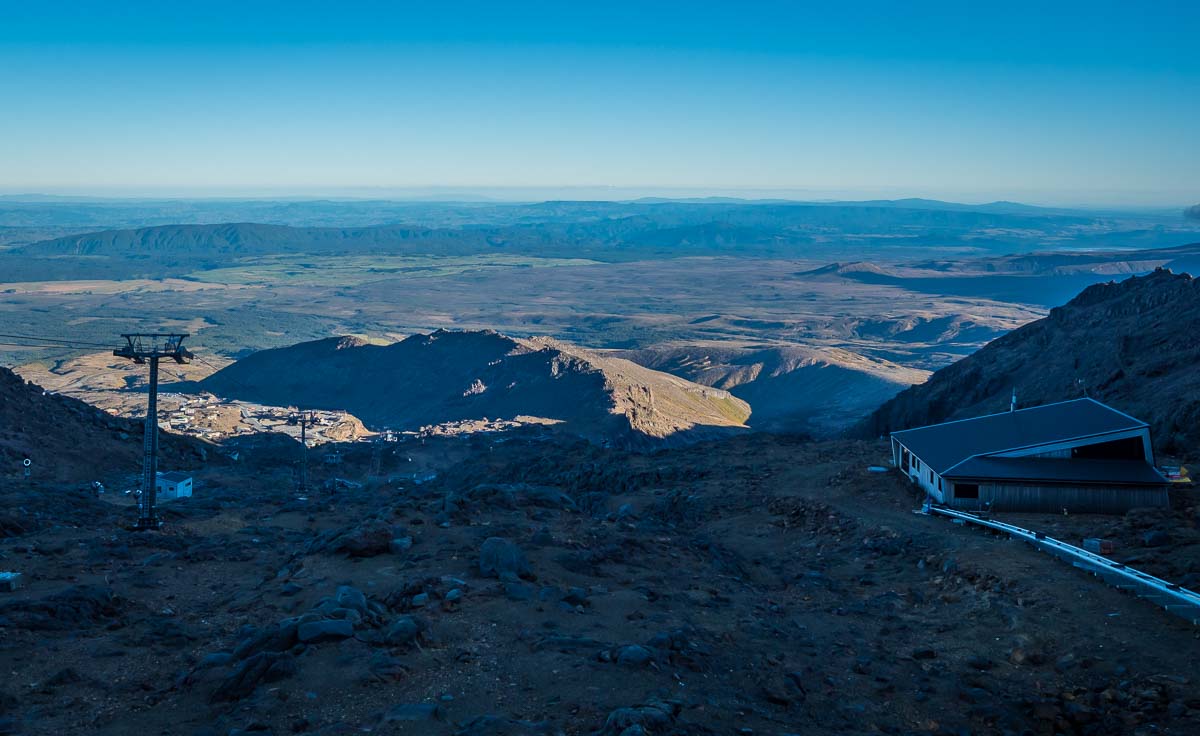
If you took the gondola, you’ll arrive at Knoll Ridge Café, which sits at around 1600 m. It’s a great place to rest and grab a coffee (yes, they serve proper barista coffee up here). The café has some spectacular views, so it’s a nice pit stop before the final push.
Head Left To Pinnacle Ridge Lookout (Side Quest)

For a more scenic experience, hikers can take a detour to the Pinnacle Ridge Lookout, which offers breathtaking views of Tongariro, Ngauruhoe, and the surrounding landscape all the way through to lake Taupo (on a clear day)
The Ascent to Dome Summit


One of the trickiest parts of the climb is navigating the ridges and exposed sections just before reaching Dome Ridge. The terrain becomes more technical here. You’ll scramble over loose rock, so the best way to tackle this section is slowly and deliberately. Keep your weight centered and use your hands for balance when necessary. If you’re hiking in winter, this section becomes harder. So I recommend bringing crampons and an ice axe.
Reaching the Summit

After what feels like an eternity of climbing, the final stretch to Dome Summit comes into view.
At this stage, my exhaustion was real. The air also felt thinner, the wind had picked up, and the ground beneath my feet was a mix of sharp, uneven volcanic rock and lingering ice patches.
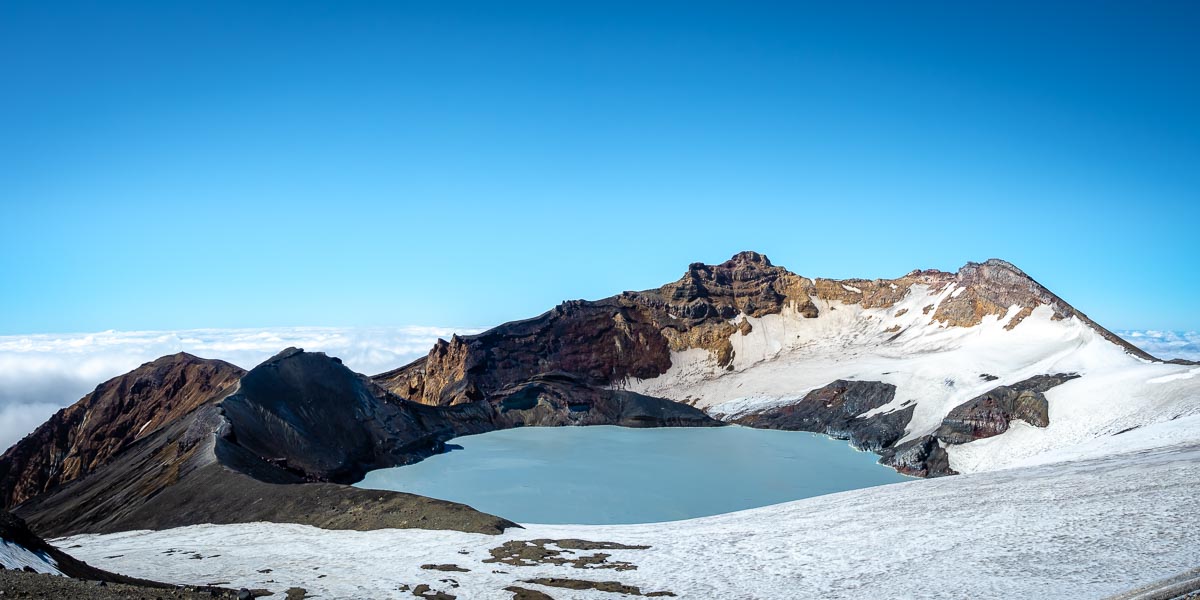
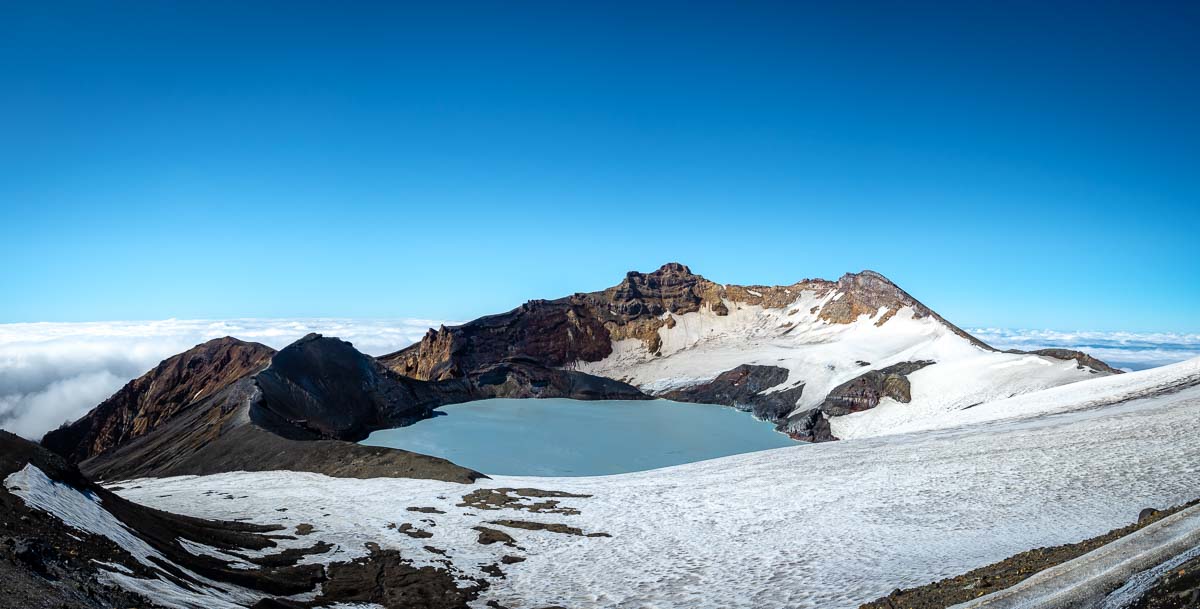
When you finally step onto Dome Summit, the view is stunning. Ruapehu’s crater lake sits just below.
The Descent
After soaking in the views and maybe grabbing a quick snack, you still have to get back down. The descent is faster than the climb, but it’s not necessarily easier. Similar to the ascent, you’ll have to maneuver loose scree. But, you get the pleasure of noticing the smaller details you might have missed on the way up.
Winter Hiking
Summer is the most common time to hike Ruapehu, but some adventurers attempt the climb in winter. This isn’t a casual hike anymore — it’s a serious mountaineering challenge. If you’re looking to summit during this time, here’s what you need to know:
- Ice and snow cover: The same loose scree and rocky terrain that make the summer hike challenging become more dangerous when covered in ice. Slipping is possible, so bring along crampons and an ice axe.
- Weather is unpredictable: Ruapehu’s weather is notoriously unforgiving. Whiteouts, strong winds, and sudden storms are common. What starts as a clear day can turn into a blizzard in minutes, and temperatures can plummet well below freezing.
- Avalanche risk: Avalanches do happen on the mountain’s upper slopes. Check conditions before the attempt.
- More gear, more skill required: If you have mountaineering experience, the winter ascent is challenging but doable. For most people, I don’t recommend trekking without proper alpine experience. If you’re keen to explore the mountain, but don’t have the skills, a guided trip with a certified guide is the safest option.
Hiking Ruapehu vs. The Tongariro Crossing:
While both mountains offer stunning views and challenging terrain, there are some key differences between the two. The Tongariro Crossing is a one-day hike that takes around 7-8 hours to complete, while climbing Mount Ruapehu can take 4-6 hours but is for experienced hikers only. Additionally, Mount Ruapehu is a less popular destination than the Tongariro Crossing, so you’re likely to encounter fewer hikers on your journey.
8 Tips to Make the Climb More Enjoyable
Most of this is pretty obvious, but alpine hiking in NZ is unique and potenitally dangerous terrain that requires a good level of perparedness. The elements can be brutal, weather change quickly, and it’s easy to get lost.
- Take a GPS map: The terrain on Ruapehu can be confusing, the path isn’t marked, so it’s easy to get lost. I use the Maps.me online map app on my phone which is free!
- Go in late summer when there’s no snow: Jan/Feb/March are the best months to climb Ruapehu, as the weather is hot and days are generally clear. The terrain is less covered in snow and ice.
- Pack smart (and light): Make sure to pack plenty of water and snacks, as well as warm clothing for changing weather conditions. Layers are key as you’ll quickly go from too hot to too cold.
- Stay hydrated: It’s important to stay hydrated during the climb, so make sure to drink plenty of water. I’d take a minimum of 2L for this hike, and ideally 3L.
- Cover up from the sun: The sun is deceptivly strong above the clouds, so make sure to wear sunscreen, a hat, and long sleeves to protect yourself from the harsh kiwi sun.
- Leave early to beat the sun: Starting your climb early in the day will help you avoid the heat of the sun. I started around 6am and was back by lunch – well before the hottest part of the day
- Be prepared for changing weather: The weather on Mount Ruapehu can change quickly and unexpectedly, so make sure to be prepared for all conditions. Rain, winds, sun and even snow!
- Take plenty of photos!: Ruapehu is the tallest mountain in the North Island and offers stunning views in every direction – make sure to bring a camera to capture the experience.
How Long Does it Take to Hike Mount Ruapehu?
This depends massivly on the the route you choose to take, your phyiscal fitness level, and the conditions on the day. You can also shave off the best part of 2 hours by taking the Sky Waka half way up. The Dome Peak route from Whakapapa takes around 3-5 hours to complete, while climbing Tahurangi Peak or Tukino Peak can take 6-8 hours.
I went to Dome Peak from the Whakapapa Ski Field car park, and it took me roughly 4 hours return.
Can You Swim in Crater Lake Mt Ruapehu?
I remember my uncle telling me stories of going up when he was a boy scout, and they all swam in the warm geothermal waters when they reached the top.
Unfortunatly, swimming in the crater lake on Mount Ruapehu is now not recommended. The water has now turned acidic and is quite dangerous. There’s also far more volcanic activity in recent years, and getting down there (and out again) can be treacherous. There have been fatalities, so I wouldn’t risk it!!
What is the Best Month to Go to Mount Ruapehu?
Late summer (February and March) is the best time to climb Mount Ruapehu, as the weather is milder and the terrain is less covered in snow and ice.
Additional Sources: